
Workshop how to convert the Fishermans house.
-
Tools and materials I used:
Cutter knife, Sand paper, Acrylpaint, Brushes, Ballpen, Set square, Squared wood, Styrodur
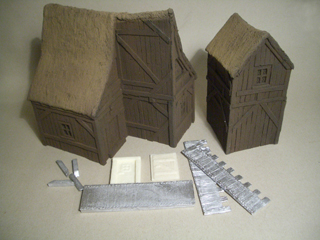
The delivery form of the hardfoam Fishermans house and what I made in this workshop:

-
Prologue
Of course there are many possibilities to convert this building.
I designed this house especially with this strange gable, to open the floodgates to creativity...
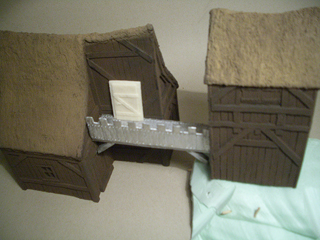
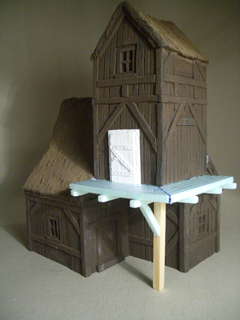
Who fears cutting the model with a knife, can place the little watchtower upon a selfmade hill and connect both buildings with the Palisade bridge from Thomarillion.
Only glue some doors onto the buildings and the conversion is finished (and the workshop too).
But I'm a fan of "destroying" the hardfoam models and so my "pal" the cutter knife gets its chance ;-)
-
Step 1
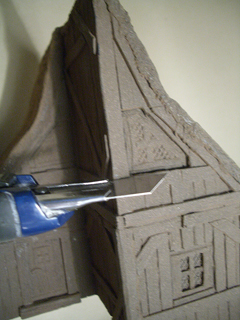
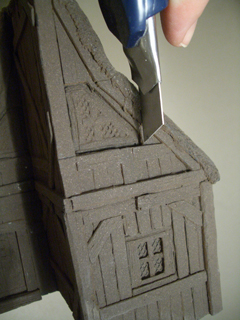
I like to place the tower above the door, near the front gable.
The window marks where I will cut into the building. At the lower edge I cut horizontal, at the right edge I cut vertical into the front gable.
-
Be careful while cutting vertically into the building that your cut is parallel to the roof.
As you can see (arrow) I did not take care to this at first but recognized it after a short distance.
Wrong cuts like this can be easily covered with paint later on.

-
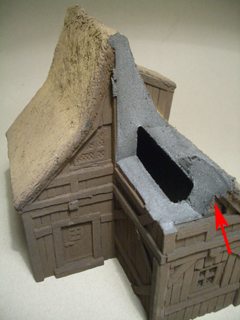
Most of the time it's better to cut off less than planned (arrow) to approach the result carefully.
-
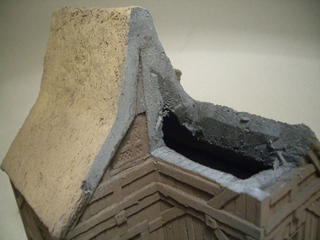
Step 2
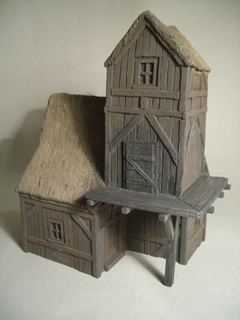
Cut off and smooth the overlaying roof of the rear gable, so the tower fits better into the roof.
I use a pen to mark where to cut.
-
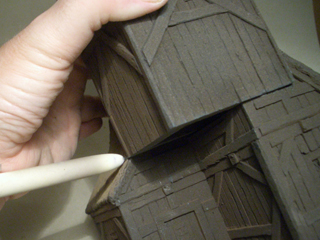
Step 3
Due to the fact that most of the tower is hanging in the air you should place a post underneath the corner.
Squared wood is suitable for that.
We could finish the conversion and the workshop at this point too. Two rakers glued onto the post underneath the tower and you're ready with the building.
-
Step 4
But I want to build some sort of balcony and of course there are many ways to achieve this.
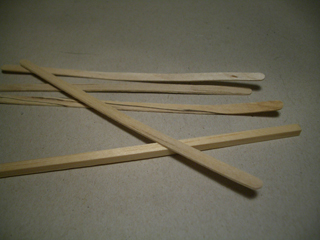
Best looking (but laborious) is to construct the balcony by yourself. Squared wood and wooden swizzle sticks are very useful for that job.
-
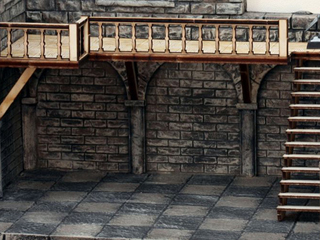
But you can also use other items which where maybe designd for other purposes.
You can easily convert the gallery of the diorama room p.e. into a balcony with staircase.
-
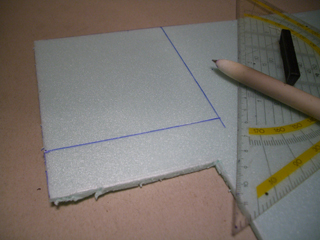
In this workshop I like to show a third and very easy way.
I cut off a piece from a thin Styrodur board and make it fit into the place I want to have the balcony.
-
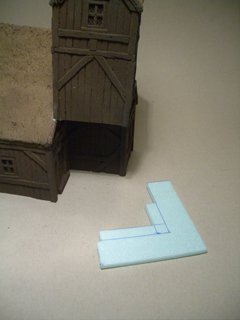
Step 5
As you can see I still need the post.
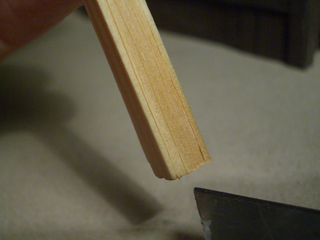
Depending on how soft the wood is you can create some grain with a scratch brush or the cutter knife.

-
Step 6
With a ball pen you can press some planks into the Styrodur before glueing it to the tower.
Even some grain you can simulate with a pointed object.
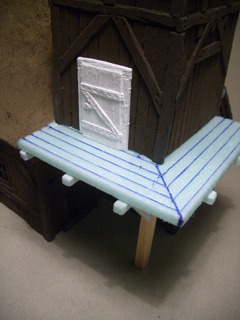
Some beams underneath the balcony, a raker at the post, and a door to access the balcony, perfect the scene.
-
Step 7
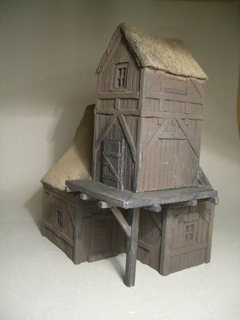
After the base coat with dark brown color the conversion is already integrated into the building.
-
Step 8
The last step is to paint the building.
I use a light brown and beige for the wood, for the roof I use beige and ivory.
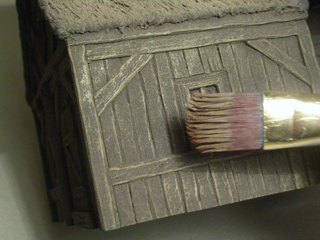
As usual I use drybrushing to paint the building. You paint from dark to light and the lighter the color the dryer the brush should be.
The trick is to hold the brush flat, so you only hit the upper regions of the surface with color. Only painting the windows and all the fixtures is a bit "annoying".
-
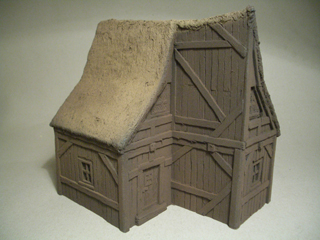
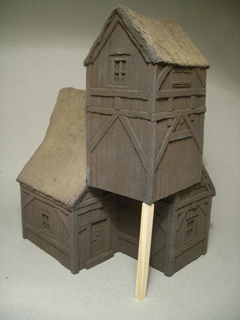
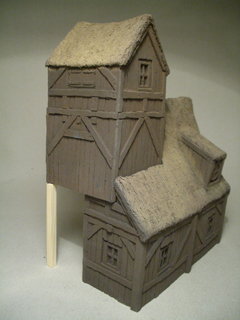
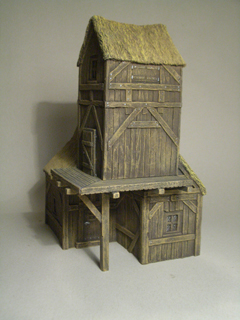
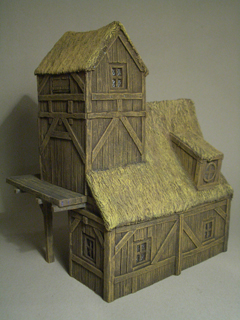
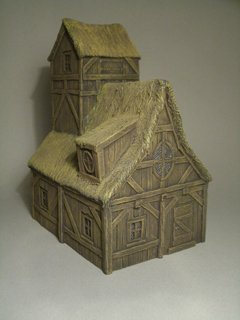
Here are some pictures of the finished conversion:
-
We wish you a lot of fun with constructing and painting.
Your team
Thomarillion